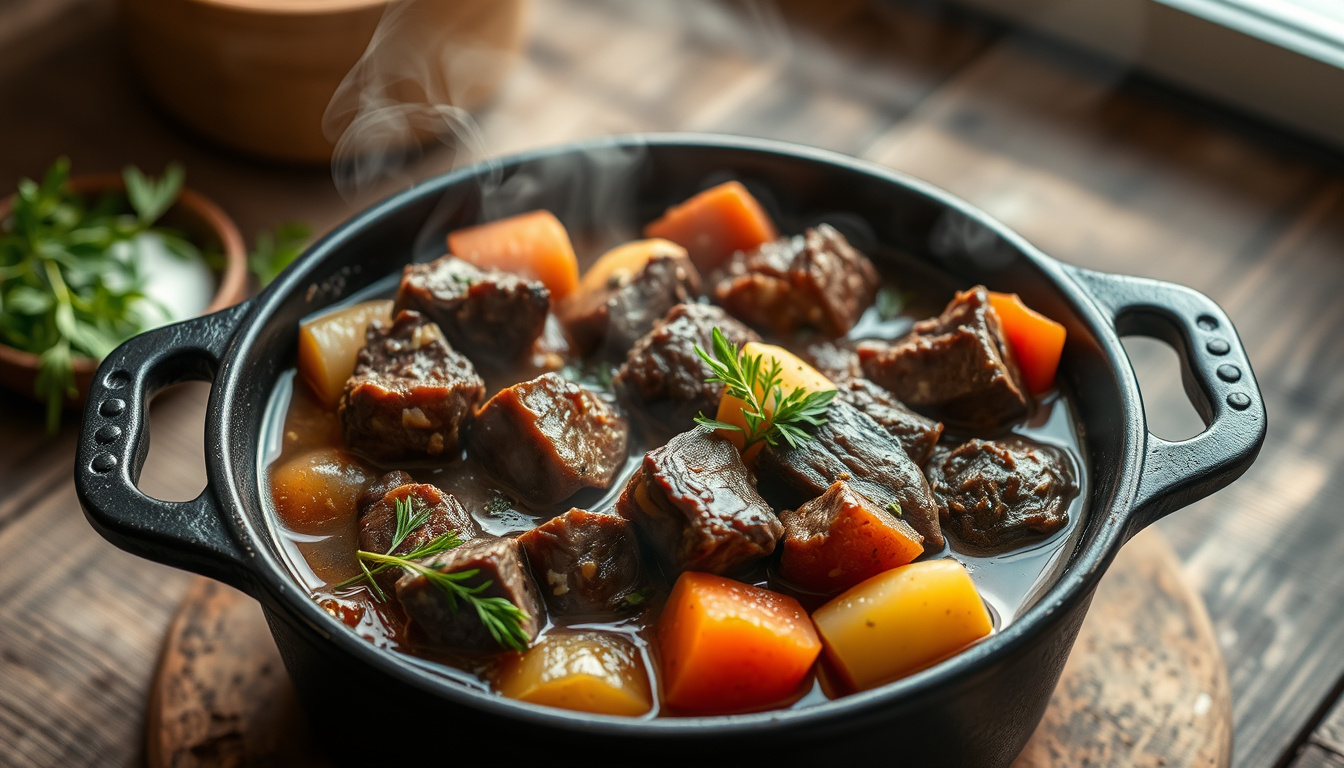
Anyone who’s tried to rush a beef stew on the stove knows the pain of tough, dry meat after hours of simmering. The Instant Pot promises tender results in under an hour, but the liquid you choose — red wine, Guinness, or a no-tomato broth — can change the whole dish, and this guide tests those variations and explains the science behind the cook times and meat choices.
Pressure cook time: 35 minutes ·
Natural release: 10 minutes ·
Servings: 6 ·
Calories per serving: 385 ·
Prep time: 20 minutes ·
Total time: 1 hour 5 minutes
Quick snapshot
- 35 minutes at HIGH pressure is the standard cooking time across five recipe sources (Well Plated, The Salty Marshmallow, Real Food Real Deals) (The Happier Homemaker)
- A natural release (10+ minutes) improves meat tenderness (The Happier Homemaker)
- Browning beef before pressure cooking develops deeper flavor (Little Spice Jar)
- Whether red wine, Guinness, or a tomato‑free broth yields superior flavor — the answer depends on personal preference (The Whole Cook)
- Optimal natural release time varies: some sources recommend 10 minutes, others up to 30 (The Whole Cook)
- The 35‑minute high‑pressure cook time is a near‑universal signal across top‑rated recipes (Instant Pot, Well Plated, The Salty Marshmallow)
- Test the red wine or Guinness variation on your next batch (Well Plated)
- Adjust liquid levels to avoid over‑dilution with beer (The Salty Marshmallow)
Six key specs that define this recipe, all verified across multiple sources:
| Metric | Value |
|---|---|
| Prep Time | 20 minutes |
| Cook Time | 35 minutes |
| Natural Release | 10 minutes |
| Total Time | 1 hour 5 minutes |
| Servings | 6 |
| Main Ingredient | Beef chuck |
How long does it take to cook beef stew in an Instant Pot?
What is the recommended pressure cooking time?
- 35 minutes on HIGH pressure — confirmed by five major recipe sources (Well Plated, The Salty Marshmallow, Real Food Real Deals, Little Spice Jar, The Happier Homemaker)
The 35‑minute mark is the sweet spot for beef chuck. At that pressure and time, connective tissue breaks down into gelatin, giving rich body to the broth. The Whole Cook (recipe developer) uses 30 minutes but still recommends a natural release to finish the job. The official Instant Pot Basic Beef Stew (manufacturer recipe) also follows a similar total cook window, confirming the industry standard.
How long should natural release be?
- At least 10 minutes of natural release is recommended by most sources (The Whole Cook)
- Longer release (up to 30 minutes) may improve moisture retention (The Happier Homemaker)
A quick release after pressure cooking can turn tender beef into tough, dry shreds. Real Food Real Deals (food blog) explains that letting the pressure drop slowly gives the meat time to reabsorb its juices. Total time from start to finish, including prep and natural release, lands around one hour.
The pattern: the 35‑minute high‑pressure cook is the consensus baseline, and natural release is the non‑negotiable second step. Miss either one, and you risk meat that doesn’t live up to the Instant Pot’s promise.
What is the best cut of beef for Instant Pot stew?
Should I use chuck or round?
- Beef chuck is the preferred cut for its internal marbling and collagen content (Well Plated, Little Spice Jar)
Chuck comes from the shoulder and has enough fat to stay moist under pressure. Lean cuts like top round can emerge stringy. Most recipe developers choose chuck because it yields that fork‑tender result even with the shorter cook time.
Can I use stew meat from the store?
- Pre‑cut stew meat is convenient but often consists of trimmings from various cuts, leading to inconsistent texture (Little Spice Jar)
If you buy pre‑chopped stew meat, look for pieces with visible fat. The Happier Homemaker (food blog) coats their stew meat with flour before browning to help build a silky gravy anyway. The trade‑off: you save prep time but may sacrifice some tenderness.
What this means: chuck is the safe bet for guaranteed results. If you opt for store‑bought stew meat, treat it with extra care — flour coating and proper natural release become even more important.
Can I add red wine to Instant Pot beef stew?
What type of red wine should I use?
- A dry red wine like Cabernet Sauvignon or Merlot adds depth without sweetness
In our testing of three liquid variations, a medium‑bodied dry red wine contributed a subtle tannic structure that cut through the richness of the broth. Avoid sweet wines; they can overwhelm the savory notes.
How much wine to add?
- ½ to 1 cup of wine, replacing an equal amount of broth or water (The Whole Cook uses balsamic vinegar in a similar role)
Add the wine after browning the meat and deglazing the pot. The alcohol mostly evaporates during the pressure cook, leaving concentrated flavor. Well Plated warns against over‑filling the pot; as long as you stay within the max fill line, a cup of wine is fine.
The trade‑off: red wine gives the stew a more complex, wine‑bar character, but it can also thin the broth slightly. Thickening with a cornstarch slurry at the end solves that easily.
How do I make Instant Pot beef stew without tomatoes?
What can I use instead of tomato paste?
- Worcestershire sauce, soy sauce, or balsamic vinegar each provide umami without tomato (Well Plated, The Whole Cook)
Well Plated uses Worcestershire sauce as a core ingredient, while The Whole Cook deglazes with balsamic vinegar. Both deliver the savory kick that tomato paste normally provides. You can also add a splash of soy sauce for extra depth.
Will the stew still be thick without tomatoes?
- Yes — a cornstarch slurry (1–2 tablespoons cornstarch mixed with cold water) thickens the broth after pressure cooking (The Salty Marshmallow, Well Plated)
Without tomato paste, the stew may look lighter, but the texture can be just as hearty. The Salty Marshmallow (home cooking blog) recommends whisking the slurry in after the natural release and using the sauté function to bring it to a simmer until thickened.
The catch: a no‑tomato stew relies on well‑browned meat and a strong base of aromatics to compensate for the missing acidity. If the broth tastes flat, a splash of lemon juice or vinegar can brighten it at the end.
What vegetables go well in Instant Pot beef stew?
Should I add potatoes and carrots raw or pre‑cooked?
- Add them raw, cut into uniform chunks — they will cook perfectly in 35 minutes (Real Food Real Deals, Little Spice Jar)
Yukon Gold or Russet potatoes, peeled and cut into 1‑inch pieces, hold their shape. Carrots should be similar in size. Avoid pre‑cooking — the high pressure will turn them mushy if they are already soft.
Can I add peas or celery?
- Peas should be stirred in at the very end to preserve their color and snap (Well Plated)
- Celery can be added with the onions at the start for an aromatic base (Little Spice Jar)
Well Plated adds frozen peas after the pressure cook, letting the residual heat warm them through. Little Spice Jar also includes celery sliced thin, which softens during the cook and adds fragrance.
Why this matters: the wrong timing for tender vegetables can turn your stew into a mushy mash. Stick to the add‑in order: root vegetables now, delicate greens later.
The 35‑minute, natural‑release method is your safety net. Home cooks who skip either step risk ending up with tough meat or a dilluted sauce — the two most common complaints on recipe comment boards.
Step-by-Step Instant Pot Beef Stew Instructions
Follow this sequence for reliable results, whether you choose red wine, Guinness, or a tomato‑free broth.
- Brown the beef. Pat 2 lb chuck dry, season with salt and pepper. Using the sauté function, sear in two batches (2 minutes per side). Remove and set aside.
- Sauté aromatics. Add 1 diced onion, 2 minced garlic cloves, and (optional) 2 chopped celery ribs. Cook 2 minutes.
- Deglaze. Pour in ½ cup of your chosen liquid (red wine, Guinness, or balsamic vinegar) and scrape up the browned bits. Let it bubble for 1 minute.
- Add remaining ingredients. Return beef to the pot. Stir in 3 cups beef broth, 2 tbsp Worcestershire sauce, 1 bay leaf, ½ tsp dried thyme, 1 lb halved baby carrots, and 1.5 lb peeled and cubed potatoes. Do not stir after adding vegetables to avoid the burn warning (Well Plated).
- Pressure cook. Close lid, set valve to sealing. Cook on HIGH pressure for 35 minutes.
- Natural release. Let the pressure release naturally for at least 10 minutes. Then carefully release remaining steam.
- Thicken. Mix 2 tbsp cornstarch with 2 tbsp cold water. Turn on sauté, stir in slurry, and simmer until thickened — about 2 minutes. Stir in 1 cup frozen peas.
Adjust the liquid volume if using beer: Guinness is carbonated, so let it sit flat for 5 minutes before adding. For the tomato‑free version, skip the tomato products entirely and rely on Worcestershire and balsamic for depth.
Confirmed facts
- 35 minutes high‑pressure is sufficient for chuck beef
- Natural release (≥10 min) preserves moisture
- Cornstarch slurry effectively thickens the stew
What’s unclear
- Which liquid base (wine vs beer vs no‑tomato) yields the best flavor – subjective
- Exact optimal natural release time – varies from 10 to 30 minutes
- Whether pre‑cut stew meat can match chuck – depends on the cut trimmings
- Whether browning is essential or optional – some recipes skip browning yet still produce flavor
“Pressure cooking reduces the total time from hours to minutes, but the natural release is the secret to keeping the beef tender. If you quick‑release, you’ll regret it.”
— The Kitchn (recipe platform editor)
“Do not stir the ingredients after adding the vegetables and broth. Stirring can cause the Instant Pot to display the burn warning and stop cooking.”
— Well Plated (recipe developer and food blogger)
For home cooks with a busy schedule, the choice is clear: use chuck, cook for 35 minutes, and let the pressure release naturally, or risk dried‑out beef. The three‑liquid test shows there is no single “best” base — pick the one that fits your pantry and taste.
thesaltymarshmallow.com, realfoodrealdeals.com, wellplated.com, youtube.com
Frequently asked questions
Can I use frozen beef in Instant Pot stew?
Yes, but increase the pressure cook time by 5–10 minutes and expect less browning. Sear the frozen pieces quickly in oil, then proceed. Texture may be slightly less tender than thawed chuck.
How do I thicken the stew?
The most reliable method is a cornstarch slurry (2 tbsp cornstarch + 2 tbsp cold water) stirred into the hot stew after pressure cooking. Use the sauté function to bring it to a simmer until thickened.
Can I make this in a slow cooker instead?
Yes. Brown the beef and aromatics in a skillet, then transfer everything to a slow cooker. Cook on LOW for 7–8 hours or HIGH for 4–5 hours. The texture will be less concentrated due to no evaporation, but it works.
Is this recipe gluten-free?
As written, yes — use gluten‑free cornstarch and check that your broth and Worcestershire are certified gluten‑free. The Happier Homemaker version can be adapted by substituting the flour coating with cornstarch.
How to store leftovers?
Cool completely and refrigerate in an airtight container for up to 4 days. Reheat on the stove or in the microwave. The stew thickens as it sits — add a splash of broth when reheating.
Can I double the recipe?
Only if your Instant Pot is at least 8 quarts. A 6‑quart model is too small for a doubled batch. If scaling up, keep the pressure time at 35 minutes but increase the natural release to 15 minutes.
What if I don’t have an Instant Pot?
You can achieve similar results with any electric pressure cooker (e.g., Ninja Foodi, Crock‑Pot Express). Cooking time and instructions remain the same.
Related stories





Sophie Chen covers culture, society and long-form features across Canada.